Author: irenearango

  • Camping with kids- a little guide

    Camping with kids- a little guide

    I posted a while back on my IG @arangoirene about going camping with our kids sharing some of the adventures we had while we were visiting a UK coastal town. I was surprised by the amount of parents that asked about it- what did we take, did the kids like it, was it cold, what did we eat while camping etc that I decided writing a blog post sharing all my experience in the matter was a must, and here it is. My guide to camping with kids!

    The most important part of camping is having the right kit. For us, these are the essentials:

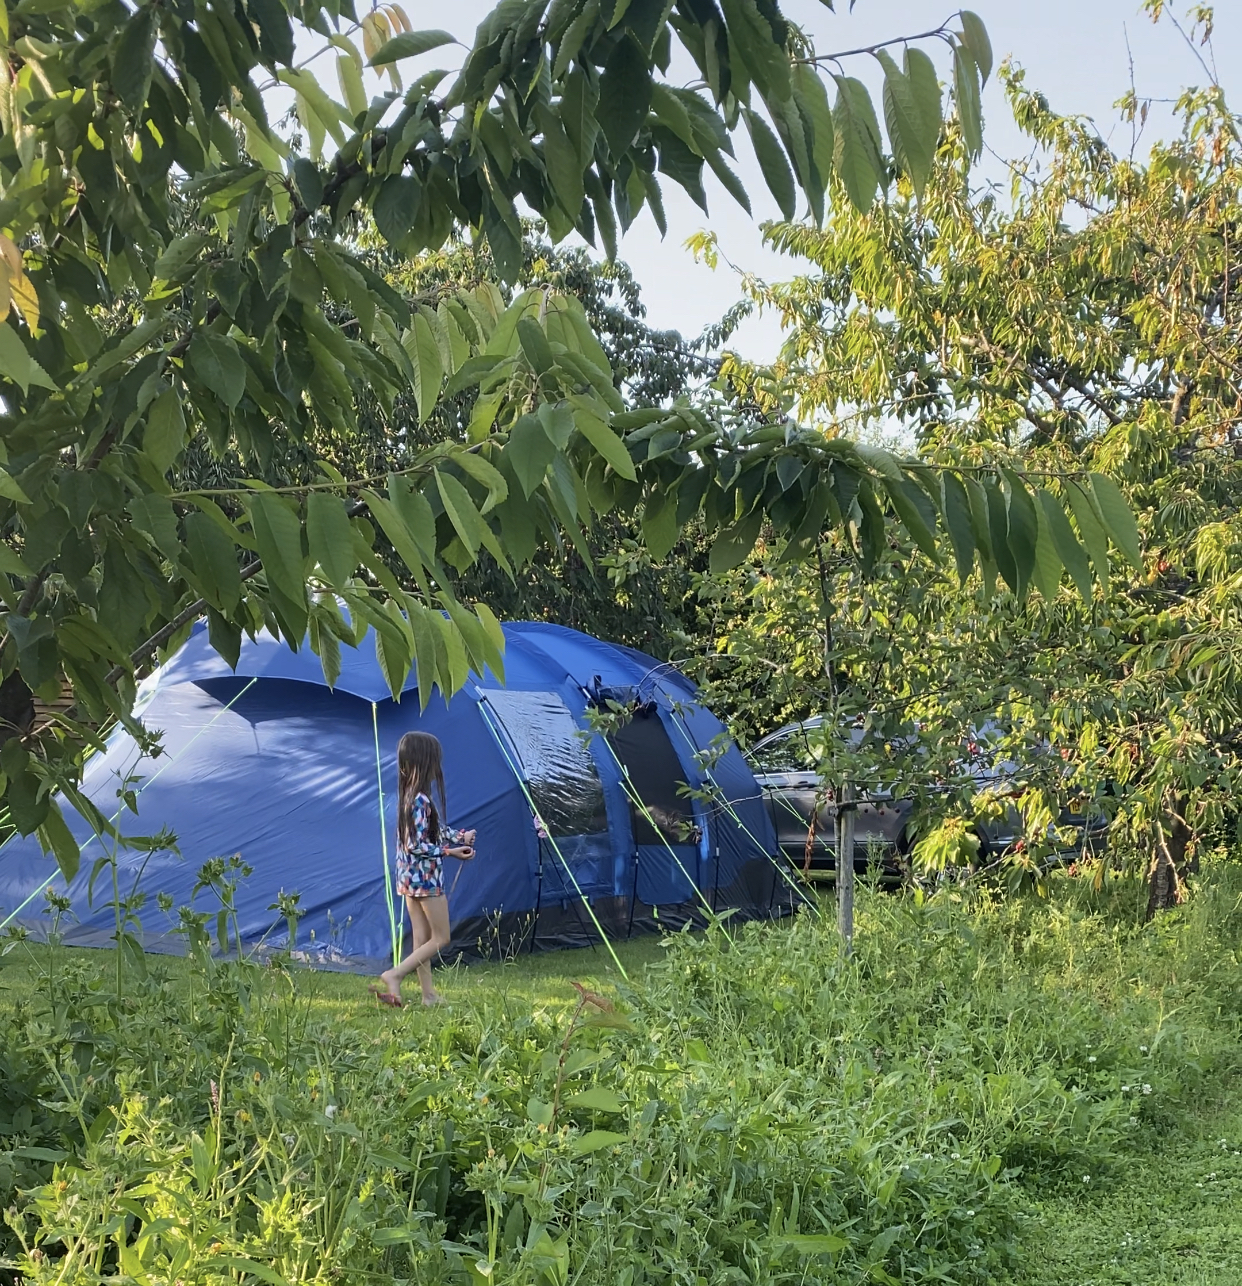
    • A good tent. We love our Regatta tent (www.regatta.co.uk) It’s a six person tent and the way its structured works perfectly for a family of 4-6 people. It’s called Karuna. It has three bedrooms, one of them on the opposite side of the other two giving some privacy as the kids grow older. For now, we all sleep in one large bedroom that can later on be divided in two by a very practical fabric zip (included). We use the other bedroom as storage keeping the living room as a place to chill if cold or rainy. We love that it has a large sitting room, a must if the weather turns, but also very practical to store all camping items and luggage. Also for those that are not keen on building their tent or if they are the only adult, I highly recommend checking the inflatable Kolima tents from Regatta. One only person can set them up and it really takes only 10 minutes!  My dream tent 🙂
    • Sleeping bags- for camping in the UK, I highly recommend a warm sleeping bag as it gets quite cold at night. I am not particularly a person that suffers with the cold, but I do appreciate having a good & warm sleeping bag. For the kids I highly recommend the sleeping bags from Regatta (the Hilo collection) that extends in size as they grow. The kid’s sleeping bags are two seasons but they are always warm in them as we don’t camp if the outside temperature overnight is lower than 8 degrees anyways. Also, I highly recommend the thermal base layers from Muddy Puddles for sleeping. They have a little hole for the thumb making sure the kids arms keep covered through the night. My kids move around a lot and this way I am not worried they will catch a cold! They also wear woolly hats if very cold.
    • Insulation mats. I find this is essential to have a good night sleep. In fact, we are never cold because we always make sure we insulate the sleeping area properly.  We use a combination of foam mats topped with self inflatable mattresses. We create a sleeping surface with the mats and then put the mattresses on top for each of us. We put the kids in between us to make sure they stay on top of the mats during the night and to insulate them from the outside temperature as much as possible.
    • Travel pillows- one of the items we have but we need to change because they are not fluffy enough. Even the kids don’t like much the ones we have. They are small to carry, but really thin once in use. My advice- invest in better ones from the start. It will make camping more enjoyable if you have a decent night sleep! NI have been told these ones from Decathlon are amazing and definitely my next purchase. Also a good price to pay for ultimate comfort don’t you think?
    • Table and chairs. We didn’t have these before and we simply used a camping blanket but after going camping with @allmumstalk and @alldadstalk and using their Regatta chairs and table we decided they were essentials too! We now have a folding table with extendable legs and comfy chairs from Regatta. The table folds and closes as a flat box and the chairs come with their own bags. Really like them and wouldn’t go camping without them!
    • Gas stove. Nothing better than coming out of your tent early in the morning and having a hot cup of tea! We have a basic Camping Gaz stove and it works perfectly for a family of four.
    • A cooler bag. We bring a basic one from Decathlon and I consider it an essential item as we bring pre (home)made meals to simplify food prep while camping. I will write more about this later on.
    • A water container. We have a collapsible water bag and we fill it for drinking and cooking without the need to go to a water source every time.
    • We also bring a frying pan and a pot for making breakfast and dinner. We usually have lunch out while we explore the area where we are staying. We also have a popcorn pan the kids love using as well as s’more sticks for the fire. Most camping sites rent or simply have firepits for use while there. Otherwise we would recommend the foldable firepit from Regatta- does the trick and can be used for cooking as it comes with a grill, its easy to empty and carry back home inside a large rubbish bag (don’t forget to bring rubbish bags too!). Can’t link it as it seems to be out of stock at this time, but keep an eye pout for it- its a fabulous item to have!
    • Head lamps and a hanging lamp for the tent- bathrooms are usually on one side of the camp and walking to them at night is tricky. Specially if like us, you prefer to camp more on the wild side rather that fully established camping sites.  We use headlamps for that to keep our hands free. The kids absolutely love these and play with them at night.
    • Frisbees and any other outdoor games you can carry for the kids, although they usually find friends at the campsite and enjoy wild play. This is the best about camping- children enjoy nature with very little else than their imagination and truly have the best time.

    We really like Regatta and have multiple items from them so we reached out to collaborate with them as we already owned a lot of their camping gear. They are well priced, have great sales and their items are durable, so definitely a great brand to get your equipment from. They provided us with the tent and the camping table.

    Another topic that seemed of great curiosity amongst our followers is what to eat while camping. Between me and my friend Esther Kufrin @ekufrin, we came up with the perfect meals to bring for two families for our last camping trip. I am sharing here our tricks and how we bring the items needed to reduce space and amount of things needed. I am sure you will come up with many other meals while reading ours, which is great!

    Breakfast. This meal we always do at camp, because the kids wake up early and its just easier to make something there for everybody before packing everything for a day out. We usually bring vegan, eggs (for those that eat them), baked beans, mushrooms and bread for the first breakfast of the camping trip. We bring the items refrigerated in the cooler and are cooked the next day so they are always fresh.  Other breakfasts we bring along breads to make toast with butter and jam and porridge. Porridge is definitely the best breakfast for camping! Doesn’t need refrigeration and its cooked fresh every time. It can also taste so different depending what you add to it. Esther makes hers with cinnamon, maple syrup, nuts and seeds and uses almond milk while my children love theirs with banana, cinnamon and maple syrup and made with oat milk. Both amazing options for a good start to the day. Sometimes I bring my spelt pancakes along to the trip (pre made) and heat them up for the kids. They can also double as snacks if we don’t use them in the morning.

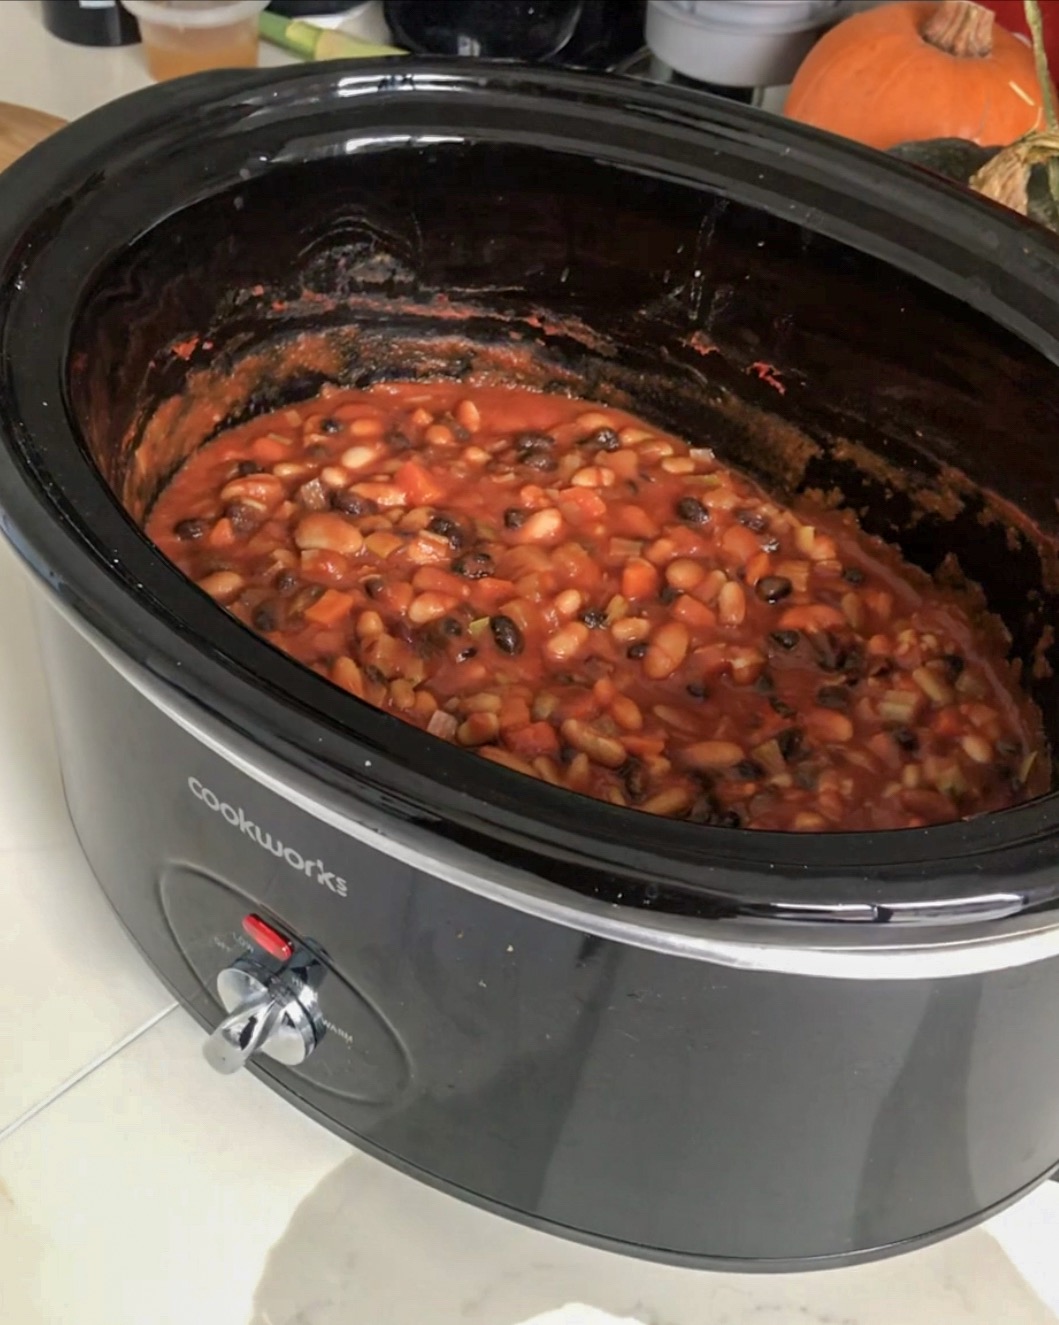
    For dinner while camping we have enjoyed having vegan burgers and sausages made in the fire pit. We bring buns, lettuce and tomatoes in the cooler and enjoy this dinner the first night. Another dinner option is what Esther calls Campsite chilli, which we make using cans of beans, passata and cans of corn cooked together in a large pot with cumin powder, a dash of chilli powder. We top the chilli pan with grated cheese and we eat it using corn chips for forks. A fun meal for the kids and very filling.

    We also have had pasta Bolognese. We make the vegan Bolognese at home and freeze it so it keeps in the cooler for a couple of days. We simply need to cook the pasta and add the defrosted chilli for a hearty and easy meal.

    Before I forget! There is another little trick I have for camping, to make the evenings and bedtimes easier for the kids. I bring their hot water bottles and fill them just before bed so they get warm and comfy in their sleeping bags. I now also have one for me, specially if we camp when the nights get colder- a total game changer!

    For any questions, please simply contact me through IG on @arangoirene and check out my reels and posts there for more images.

  • Bounty style bars

    Bounty style bars

    The kids absolutely love making (and eating!) these. They are not only easy to make, but they also needs very few ingredients and the result its always delicious.
    I don’t usually follow a recipe but because we did an Instagram Live cooking session with @triplets_in_my_kitchen I actually wrote the measures down so I though it would be good to share it here.

    You will need a large bowl to mix all the ingredients it, a pan and metal bowl for melting chocolate bain marie style, and a spoon for mixing.

    Ingredients
    100gr shredded coconut
    1 tablespoon date paste* or maple syrup
    1 tablespoon coconut oil, melted
    1/4 tsp salt
    Chocolate of choice for melting. I make our own or use Raw Halo or Pico.

    In a bowl, mix the shredded coconut with the date paste and coconut oil. shape with your hands into logs or press the mixture into a tray. Place in the freezer for 20-30 minutes. Melt the chocolate using the bain marie method and dip the frozen logs until covered in chocolate. Let the chocolate set by placing them onto a parchment paper sheet after dipping.

    To watch our videos on how to make these, click here


    *date paste can be made by soaking 1 cup of pitted dates for 1 hour, discarding the water and blending them with a dash of fresh water until smooth.

  • Vegan Fluffy Spelt pancakes recipe

    Vegan Fluffy Spelt pancakes recipe

    I don’t know if your kids are the same, but Ariana and Oliver love making requests for special breakfasts (other that the usual sugar free cereal I give them daily) and one of their all time favourites is pancakes!

    As you know traditional pancakes are made with white flour, eggs, milk and sugar so not really the type of thing I would make for my kids but luckily they are pretty easy to make vegan and, in my opinion, way more delicious as well.

    My recipe uses spelt flour, but I have also made them gluten free using buckwheat flour and the recipe works too. I personally love using spelt for the slightly nutty flavour they bring to the end result. I tend to eat my pancakes plain, so using spelt flour is important to me.

    The other reason I love this recipe is because, although I am giving you measures, I make it without measuring anything so its really a one bowl to clean kind of breakfast recipe- less mess, less cleaning makes it easier for me to say yes to requests for special breakfasts in the house. It is simply a very forgiving recipe and one that I adjust to make thicker fluffier pancakes or flat large rounds for crepes too.

    Also I like it because you only need regular ingredients most of us have at home, so no special trips to the store are required. Basically they are all pantry staples so I can make them at very short notice.

    So the recipe goes as follows:

    🥞 300gr white spelt flour
    🥞 400ml plant milk
    🥞 40gr of coconut sugar
    🥞 4 tablespoons melted coconut oil
    🥞 2 teaspoons vanilla liquid
    🥞 Pinch of Himalayan salt
    🥞 2 teaspoons baking powder

    Mix all ingredients together in a bowl until there are no lumps. Pour batter in rounds to a hot shallow pan at medium heat until there are bubbles on top, then flip to brown the other side and serve hot drizzled with maple syrup and with lots of berries and bananas.

  • Heart bagels- perfect for a quick lunch!

    Heart bagels- perfect for a quick lunch!

    We are so excited to have started our half term holiday. I think this time around, the most excited one is mum as I don’t have to be a Primary School teacher for the next week and trust me, it was hard work 🙂 So, now we have full 10 days ahead of us to fill with adventures and of course, we are limited on what we can do. No traveling, not mixing with other families etc, but we won’t let this bring us down! We are going riding this weekend as the horses still need to be exercised and cared for regardless of lockdowns so at least we have that to look forward to for tomorrow. We have decided to bring our lunch along and make a day out of it and thats why these bagels were made. Just to keep the kids busy I decided to make our own sandwich bread. I usually buy the pita style bread from @farinalondon because its soft easy to eat for kids while being big enough to make a good sandwich size even for the adults. Plus as they deliver it every morning, we always have it freshly baked. But for this occasion I made the kids do all the hard work instead and we made these delicious vegan bagels using a slightly modified recipe from Bread Ahead Bakery we found in Metro newspaper online 🙂 Bread Ahead makes really delicious breads and pastries and has a fabulous online school that I wish I had a membership for. Check them out for sure and if you are in Borough Market area, do visit their bread shop. So now on to the recipe. Bear in mind that you really need the fesh yeast. You can find it in Ocado or sometimes if you ask in the bakery section of larger supermarkets they will sell it there too. This recipe makes 7 regular size bagels. 14g fresh yeast 7g syrup (you can substitute honey if desired) 270g cold water 465g strong white bread flour 7g fine sea salt 60g sugar Oil (for brushing) Seeds (optional)  Bread Ahead explain: ‘Begin by dissolving the yeast and the malt syrup in the water. Add the flour and salt. Bring the mixture together until incorporated. Put your dough on the table and begin to stretch and tear the dough. You need to do this for 6 minutes to develop the gluten. Put back into the bowl, cover and leave for 1 hour.  ‘Divide the dough into pieces, roughly 110g each. Shape in to a round’ This is where we started making things different to make our heart shapes. We put a bit of oil in a finger and made a hole in the middle of each ball and stretched to make the ‘hole’ on the bagel larger. Then shaped each donut into a heart shape (or as close as we could get!). Once ready we placed each heart bagel on a lined and oiled tray leaving plenty of space for the dough to raise slightly. Set aside for 10 minutes while you prepare the water bath. This sounds strange but its very easy and quick and its what makes the difference between bagels and a regular bread roll. Add the sugar (we always use unrefined cane sugar, but any sugar will do for this part) to a large pot full of simmering water and gently dip the bagels for 20 seconds on each side. Brush the bagels with a bit of oil and sprinkle with seeds if desired.  Bake at 200 degrees Celsius until golden-brown. Enjoy filled with your favourite foods. I am thinking of eating mine filled with vegan gravlax and cashew cream cheese with dill. Would you like these recipes as well? We are so excited to have started pour half term holiday. I think this time around, the most excited one is mum as I don’t have to be a Primary School teacher for the next week and trust me, it was hard work 🙂 So, now we have full 10 days ahead of us to fill with adventures and of course, we are limited on what we can do. No traveling, not mixing with other families etc, but we won’t let this bring us down! We are going riding this weekend as the horses still need to be exercised and cared for regardless of lockdowns so at least we have that to look forward to for tomorrow. We have decided to bring our lunch along and make a day out of it and thats why these bagels were made. Just to keep the kids busy I decided to make our own sandwich bread. I usually buy the pita style bread from @farinalondon because its soft easy to eat for kids while being big enough to make a good sandwich size even for the adults. Plus as they deliver it every morning, we always have it freshly baked. But for this occasion I made the kids do all the hard work instead and we made these delicious vegan bagels using a slightly modified r ecipe from Bread Ahead Bakery wefound in Metro newspaper online 🙂 Bread Ahead makes really deliciousbreads and pastries and has a fabulous online school that I wish I had a membership for. Check them out for sure and if you are in Borough Market area, do visit their bread shop. So now on to the recipe. Bear in mind that you really need the fesh yeast. You can find it in Ocado or sometimes if you ask in the bakery section of larger supermarkets they will sell it there too. This recipe makes 7 regular size bagels. 14g fresh yeast 7g syrup (you can substitute honey if desired) 270g cold water 465g strong white bread flour 7g fine sea salt 60g sugar Oil (for brushing) Seeds (optional)  Bread Ahead explain: ‘Begin by dissolving the yeast and the malt syrup in the water. Add the flour and salt. Bring the mixture together until incorporated. Put your dough on the table and begin to stretch and tear the dough. You need to do this for 6 minutes to develop the gluten. Put back into the bowl, cover and leave for 1 hour.  ‘Divide the dough into pieces, roughly 110g each. Shape in to a round ball’ This is where we started making things different to make our heart shapes. We put a bit of oil in a finger and made a hole in the middle of each ball and stretched to make the ‘hole’ on the bagel larger. Then shaped each donut into a heart shape (or as close as we could get!). Once ready we placed each heart bagel on a lined and oiled tray leaving plenty of space for the dough to raise slightly. Set aside for 10 minutes while you prepare the water bath. This sounds strange but its very easy and quick and its what makes the difference between bagels and a regular bread roll. Add the sugar (we always use unrefined cane sugar, but any sugar will do for this part) to a large pot full of simmering water and gently dip the bagels for 20 seconds on each side. Brush the bagels with a bit of oil and sprinkle with seeds if desired.  Bake at 200 degrees Celsius until golden-brown.

    Enjoy filled with your favourite foods. I am thinking of eating mine filled with vegan gravlax and cashew cream cheese with dill. Would you like these recipes as well?

  • Valentines inspired cinnamon rolls

    Valentines inspired cinnamon rolls

    When I started thinking about what to do with the kids this year to celebrate ‘love’ at Valentine’s Day the first thing that came to mind was to make something heart shaped. So far, in previous years, we have made many different cakes with heart shapes and it was fun, but wanted to do something different this time around. This is when heart shaped cinnamon rolls, a household favourite, became a thing for me.

    We have been making cinnamon rolls for ages because of my husband Eric Swedish roots, and when the kids were very little, we used to make heart shaped rolls using puff pastry and vegan cheese as a quick snack. So the recipe was decided and all we had to do was making the rolls and hope that shape will remain after baking!

    The first thing you need to know before making cinnamon rolls if that they require time. Not so much for ‘making’ them as such, but time for the raising of the dough. And there is two proving periods of at least 1 hour each, so the sooner you would be able to have the rolls in front of you is 2.5 hours from the start time. This is why I prefer to make my dough the night before I plan to bake them. This way it really feels like no work at all when I sit down to enjoy one in the morning while still warm from the oven barely 25 minute after I woke up 😉

    The ingredients are very basics as making cinnamon rolls is not that different from making a dough for bread. It is in the filling of the rolls that we add the sweetness and flavour with the sugar and cinnamon combo.

    I make a large tray of rolls every time, sometimes I even double the recipe and freeze some rolls after the second raise so we can have freshly baked rolls at short notice. This recipe will make you 12 large rolls or 16 smaller ones (I tend to do smaller ones regularly but went larger for the heart shaped ones).

    Dough
    450gr strong or bread flour
    80gr unrefined cane sugar
    70gr vegan butter, melted
    125ml plant milk
    125ml lukewarm water
    10gr quick yeast powder
    5gr Himalayan salt
    5gr unrefined cane sugar (to feed the yeast)

    Filling
    15gr cinnamon (powder)
    120gr unrefined cane sugar
    50gr vegan butter, melted

    The first thing to do is activate the yeast by mixing the lukewarm water with the sugar and adding the yeast. Leave the mixture activate while you put together the rest of the ingredients.

    I mix my cinnamon rolls dough in the mixer as it is a lot faster but by all means this can be done by hand if you don’t have one. It works the same.

    In the bowl of the mixer add the flour, salt and sugar. Then add the melted butter and start operating the mixer at the lowest speed. Add the milk and the yeast mixture and mix until the dough is elastic and smooth. it takes a few minutes. you can add a bit more flour if needed or a bit more milk to make sure its elastic and not sticky.

    Leave the dough covered with cling film in a warm place for 1 hour to raise. once this is done, bring into a floured surface and deflate by mixing it for a couple of minutes. Then use a rolling pin to spread the dough to a rectangular shape making the layer as thin as possible.

    Now it is time to do the filling. In a bowl mix the sugar the the cinnamon. Spread the melted butter over all the surface and then sprinkle the sugar/cinnamon powder covering the butter and all the surface of the dough to the borders.

    At this stage we prepare the tray to place the prepared cinnamon rolls. Sometimes I skip this step, but it does make the rolls a lot more gooey, so give it a go! Melt some butter (around 50gr or so) and add 3 tablespoons unrefined cane sugar. Spread the mixture in the bottom of the tray.


    To make heart shaped cinnamon rolls, start by making the dough into strips. Then take each strip of dough and start rolling the dough by folding it over on itself un til the middle of the dough. Do the same from the opposite side and let the two rolls meet in the middle. Once you are placing the cinnamon rolls in the tray, make sure the overall shape resembles a heart. You will need to leave a lot of space between rolls to prevent the hearts from being squeezed together.

    The prepared tray can now be left to raise for about an hour before baking. If you are making them for the next morning, let them raise again and then place the tray covered with cling film in the fridge overnight.

    Heat the oven to 180 degrees and bake them for 15minutes or until they are quite golden on top. You can eat them like this or frost them with a mixture made with 1 cup icing sugar and 3 tablespoons plant milk. We never skip this last step!

  • Allotment life with kids

    Allotment life with kids

    Some of you might know that we have an allotment as I share snippets of our time there on our IG grid. Many times I have been asked how we manage the kids while we are there and what do the kids help with so I thought I would share some of the things the kids enjoy doing and what do I do to ensure we have a pleasant time at our veggie garden.

    We have had the allotment since four years now and we share the site with another lovely family (the founders of our all time favourite lollies Lickalix) and between us all we have four children in between 0-7 years old.

    Very early we discovered that the key to kids enjoying the allotment is to make sure they have their own set of easy tasks to complete (and plenty of snacks!). They do not like to do everything, so we try and allocate them considering what each child likes most. For example, Oliver loves digging while Ariana enjoys planting more. All the kids absolutely LOVE picking strawberries and raspberries and these never make it home with us 🙂

    So my tips for a successful allotments day are:

    • bring plenty of snacks
    • allocate a couple of tasks to each child so they feel useful and part of the ‘team’
    • bring games like puzzles or figures for free play.
    • go in blocks of a couple of hours, too long and kids get restless
    • bring a friend of the kids along for longer days

    The things the kids help woth are:

    • preparing the ground. Oliver enjoys the digging in March preparing the soil fro planting in spring and summer.
    • Ariana enjoys helping with the potting and growing the seeds at home to them plant at the allotment.
    • both kids enjoy picking. Their favourites to pick are the fruits because they eat them as they pick them, but they also help with beans and peas, tomatoes, cucumbers and courgettes.
    • digging for potatoes. They both like this and play competitions to see who gets more potatoes out of the ground and who gets the largest.

    I think kids learn to enjoy things as they go, so don’t get frustrated if they complain the first few times. These two have learnt to search for lady bugs, play with butterflies, dig for worms and recognise different types of birds and now enjoy these things and ask to go to the allotment to do more of it.

    A lot of other allotment people say that it is a great idea to leave a space for the kids to grow their own plants. I have given the kids a space in our garden at home for this and Ariana is growing flowers instead of vegetables. I think the important thing is to let kids discover nature and understand where food comes from and that it takes time and effort for this to happen. The rest is just getting dirty and having fun and we all know kids are experts at this!

    The kids are wearing Molo clothes from our favourite clothing store Childrensalon. You can read more about kids and allotment life here in a lovely blog post done in collaboration with Childrensalon.

    Ariana’s outfit

    Oliver’s outfit

  • Vegan Vanilla Sugar Christmas Cookies

    Vegan Vanilla Sugar Christmas Cookies

    Nothing better than homemade gifts for Christmas (at least I feel that way!) So the kids and I have been making bags of cookies for our friends and neighbours to gift them this Festive Season.

    To be honest, it’s both for our friends benefit as much as ours as I keep the kids busy in the afternoons baking and decorating and we get homemade cookies every day 🙂

    So without further delay, this is the recipe we have been using for years and we would love to share it with you! I love that we now have block vegan butters such as Naturli, as the texture of the cookies in this recipe has very much improved since we use this brand.

    Of course the look of the cookies will depend on which cookie cutters you use. I have purchased these cutters from Wish that come with a stamp, so we don’t necessarily have to use icing to make the cookies look pretty. It saves time and reduces the amount of sugar used, but obviously the kids love icing cookies, so we also make lots of the plain type.

    Vegan Vanilla Sugar Cookies

    250gr vegan butter at room temperature. I use @naturli 
    220gr icing sugar
    375 g plain flour
    ½ tsp baking powder
    1 tsp Himalayan salt
    4 tbsp plant milk
    1 tsp vanilla liquid

    Cream vegan butter and icing sugar until fluffy using either a manual or electric whisk . Add the other ingredients and the flour in two batches and mix until well incorporated.

    Place the dough rolled in cling film in the fridge for about 1 hour to firm up.

    Roll the chilled dough to 0.5/0.7cm thickness and cut shapes. If you wish the shapes to remain more or less the same size, you can plavce the cookies on teh tray into your fridge or freezer before baking.

    Bake at 180 degrees until slightly golden on top. I like them crunchy so i let them cook a minute longer than necessary 😉 It’s very important that you let cool down on the baking tray for a few minutes as they will be very soft and breakable at this stage, before placing them on a cooling rack and store them in an airtight container. You can package them as needed for your gifts 🙂
    .

  • Raid the Fridge Chickpea Muffins

    Raid the Fridge Chickpea Muffins

    This is one of those easy go-to meals we use for picnics or when I know I won’t have time to make proper lunch but still want to make sure i get some goodness into the kids. The bonus is that both me and Eric really enjoy them too so it’s the perfect family meal or an even be served as a brunch item for a get together. It’s also perfect to empty the fridge of 1/2 used vegetables.

    2 cups of chickpea flour
    2 cups water
    2.5 cups of chopped veggies (use any about to expiry on your fridge or choose specially)
    1 teaspoon baking powder
    1 cup vegan cheese, grated or chopped into small cubes
    2 tablespoons olive oil
    Salt to taste
    1 tablespoon Nutritional yeast (optional for flavour)
    1 tablespoons veggie stock powder (optional for flavour)
    Any herbs of choice (optional for flavour)

    Some of our favourite vegetable combinations are below but we have made them with pretty much any vegetable leftovers we randomly find in our fridge.

    -Tomato, spinach, corn
    – Cooked sweet potato, peas and corn
    – Courgette, tomato and leek
    – Bell peppers, onions and corn

    Preheat the oven to 180 degrees. Put you veggie combo in a bowl, add the chickpea flour, and optionals such as veggie stock and nutritional yeast, add the baking powder and water, oil and mix well. Pour the liquid batter into an oiled muffin baking tin and bake at 180 degrees for 20 minutes.

    Let them cool down in the tin out of the oven for 10 minutes before removing so the middles get cooked throughout.

    The children were beautifully dressed by Children Salon for this shoot and we also shared this recipe on their channels. Shop the kids outfits here:

    Jumper: https://csalon.co/zbQ

    Shorts: https://csalon.co/zbR

    Dress: https://csalon.co/zbS

  • Lockdown and homeschooling- how we are learning and having fun

    Lockdown and homeschooling- how we are learning and having fun

    During these difficult times in the world we, like many other people, are suddenly in charge of our children education. This can be quite a shock for many parents, just like it was for us until we realised that there is a lot of help out there to make learning fun at home!

    I think I have mentioned before that Ariana is super creative and loves to make artistic things while on the other hand, she absolutely loves maths, science and coding! So there is not surprise here that Ariana’s favourite thing to do is use her Osmo Creative Kit to fill her creative side and then spend hours (and I actually mean HOURS) coding with the Osmo Coding Awbie game that connects to the base that comes on all Starter Kits.

    In the meantime, I can spend time doing things with Oliver knowing that Ariana is learning valuable skills. The Osmo Kits go from 3-12 years of age, so fit all ages in primary and has plenty of different games and activities for the kids to enjoy. Due to the success of the first couple of games we tried and taking advantage of the Spring Sales on Amazon (that ends April 16th so hurry up!) I have also purchased a few other games that I am sure Ariana will love as they are math based. So far, Oliver has done coding as well (he actually managed pretty well I have to say!) and has used the Creative Pad for drawing and bringing his drawings to live. He absolutely loved this- you basically draw on the pad and Osmo brings it into the iPad (or Android) screen to becomes part of the game.

    We also have Detective Agency- search and Find Mystery Game that both have played together peacefully giving me time for a lovely cup of coffee and to clean the kitchen 😉 This one is more on the entertaining side, but it still teaches the kids while having fun.

    All in all, I have to say that we truly love this gift we received from Osmo. I find it super useful and entertaining and highly recommend it. Also, there is a lovely giveaway you should enter HERE I wish you all the best of luck and a peaceful lockdown. Big hugs!

  • Homemade bath bombs

    Homemade bath bombs

    Ariana is a big fan of bath bombs. I mean, who isn’t right? It’s just so satisfactory watching them dissolve in your bath while the smell of the essential oils surrounds you, the colours make your bath water look cool and you see all those tiny bubbles disturbing the surface of the water…

    Unfortunately, good quality bath bombs tend to be very expensive and a lot of them use not so good for the skin colouring agents. That’s when Ariana asked me why couldn’t we just made our own. And I though, oh well, why not? We had previously attended a workshop at Lush, where they taught us how to press the bath bombs together, so it was really a matter to make the mixture beforehand. I started my research and I discovered that making your own is pretty popular and you can even buy kits for it on Amazon (like this one) but I preferred to select our own essential oils and use different colourings for ours and we simply bought each ingredient separately.

    Obviously being Ariana who she is, an aspiring scientist, she started asking me why bath bombs fizz, but during my research I had already prepared the answers to the questions I thought she would ask and I was prepared! So I started to explain about chemical reactions and how when baking soda and citric acid are mixed and are then put in water, react against each other making all the little bubbles that we see while the bath bombs dissolves in the bath water. These bubbles that make the water become so fizzy are made of carbon dioxide gas. I stopped the explanation right after explaining what carbon dioxide is because otherwise there would have been no end!

    So, without further info to share except the recipe, I’ll just write that up for you 🙂

    You will need:
    – 2 cups baking soda
    – 1 cup epsom salts, powdered
    – 1 cup citric acid
    – 1 cup cornstarch
    – 5 tablespoons coconut oil, melted
    – a bit of water in a spray bottle
    – 30 drops your preferred essential oil
    butterfly pea powder for the blue, turmeric for the yellow, pitaya powder for the pink (or you can use food colouring)
    – a large bowl to mix into and separate smaller ones for the different colours
    – bath bomb moulds (we used these ones), chocolate silicone moulds or similar

    In the large bowl, mix the citric acid, epsom salts, cornstarch and baking soda. Add the coconut oil slowly and mix well, spray water regularly until you can just about press the mixture and it keeps its shape. Don’t add more water at that stage. It’s important to not add the water all at once at the beginning as you can activate the chemical reaction and have the bubbles starting before you even made the bombs!

    At this stage you can add the essential oils and mix well and then divide the mixture into smaller bowls ready for colouring. Add the colours to each bowl mixing well to have an homogeneous looking bath bomb.

    Now it’s time to make the bath bombs! All you need to do it to fill both sides of a mould with your preferred colours, whether its a mixture of various ones in layers or just one. you need to fill the bath bomb way more than to the top but don’t press the top much as you want the two sides to merge when you press them together and it doesn’t happen if each side has been already pressed down. (hopefully this makes sense to you!)

    Once you have boths sides overfilled, merge them quickly together and press to make the bath bomb shape. Some excess mixture will come out- that its normal. And that’s it. Definitely not rocket science and its a lot of fun to do. Apart from the science lesson, you can also ask the kids to help measure the ingredients etc so they get engaged during the whole process. Keep each bath bomb on its mould until the next day so they set. After 24 hours they are ready to be taken out of the mould and use or store for up to 6 months 🙂


  • When fun meets learning

    When fun meets learning

    There is nothing I appreciate more than time spent with the kids having fun, but when that time also doubles as time spend with the kids learning its even better! We have been reviewing games from Orchard Toys and I have to say that we have loved them.

    We already had their iconic Little Bus Lotto Game, (possibly you have this one too, check the cupboard!) but we have got to know a few more than have become favourites around here pretty quick. you see, games are a fantastic way to keep the kids away from the dreaded TV, or if like us you don’t have oner, the iPads, most of them need to be played by 2 or more kids, so they encourage participation and builds social skills and teaches the kids good lessons on winning and losing but because the games are short, its great that all kids can win a time or two in an afternoon playing so nobody feels bad about it.

    Our current favourite is Giraffes in Scarves, a funny game, where the little kids like Oliver practice addition and it is also fun for children Ariana’s age so they both play it together most afternoons. There are also some games we want to try for Ariana like Match and Spell, The Counting Mountain, The Bus Stop Game, and other like these (check more here) to practice literacy and math skills.

    Definitely these are my favourite games to buy for the kiddies and I think they make fabulous christmas presents or birthday presents. The price is very gentle on the wallet and they provide countless hours of fun, all while learning. Can’t go wrong with them!


  • Vegan Bean Chilli

    Vegan Bean Chilli

    While we tend to make this recipe more in wintertime, the truth is that this delicious vegan bean chilli recipe can be used all year round and we do so- it’s perfect to make vegan chilli dogs at a BBQ!
    What I love most about this recipe is the fact that can be made ahead (and tastes even better this way) which makes it perfect for the weekends. It is also super easy to make and can be made in a slow cooker, a pressure pot or a pan so anyone can actually make it 🙂

    To make this vegan bean chilli you will need:

    3 cans of mixed beans (I use whatever I have at home but I prefer to add a can of black beans to two of mixed beans)
    3 stalks of celery
    3 medium carrots
    1 leek
    500ml jar of passata
    1 1/2 tablespoons cumin
    1 teaspoon of smoked sweet paprika (we call it pimenton dulce in Spain)
    2 tablespoons of powder vegan stock
    Himalayan salt to taste
    Chilli powder to taste (i only add when serving as the kids don’t eat spicy food)

    Chop the celery and carrots into small cubes, thinly slice the leek and sautee all three in the olive oil until the leek is soft. Add the chopped garlic and cook until golden, then add the mixed beans, the passata and the rest of the ingredients and cook until the mixture has thicken and the carrots are soft. I use my slow cooker for this and leave it on in slow for 7 hours. You will have to adjust cooking times for your pan/pressure pot accordingly.

    We love serving this vegan bean chilli with quinoa, rice or cous cous, vegan shredded cheese, guacamole, corn chips and cashew sour cream.
    If you use cheese, I like putting the chilli in an oven safe tray, top it with the vegan cheese and melt in the oven before serving it. It goes well with my recipe for vegan cheese bread rolls.