Category: Crafts

  • Lockdown and homeschooling- how we are learning and having fun

    Lockdown and homeschooling- how we are learning and having fun

    During these difficult times in the world we, like many other people, are suddenly in charge of our children education. This can be quite a shock for many parents, just like it was for us until we realised that there is a lot of help out there to make learning fun at home!

    I think I have mentioned before that Ariana is super creative and loves to make artistic things while on the other hand, she absolutely loves maths, science and coding! So there is not surprise here that Ariana’s favourite thing to do is use her Osmo Creative Kit to fill her creative side and then spend hours (and I actually mean HOURS) coding with the Osmo Coding Awbie game that connects to the base that comes on all Starter Kits.

    In the meantime, I can spend time doing things with Oliver knowing that Ariana is learning valuable skills. The Osmo Kits go from 3-12 years of age, so fit all ages in primary and has plenty of different games and activities for the kids to enjoy. Due to the success of the first couple of games we tried and taking advantage of the Spring Sales on Amazon (that ends April 16th so hurry up!) I have also purchased a few other games that I am sure Ariana will love as they are math based. So far, Oliver has done coding as well (he actually managed pretty well I have to say!) and has used the Creative Pad for drawing and bringing his drawings to live. He absolutely loved this- you basically draw on the pad and Osmo brings it into the iPad (or Android) screen to becomes part of the game.

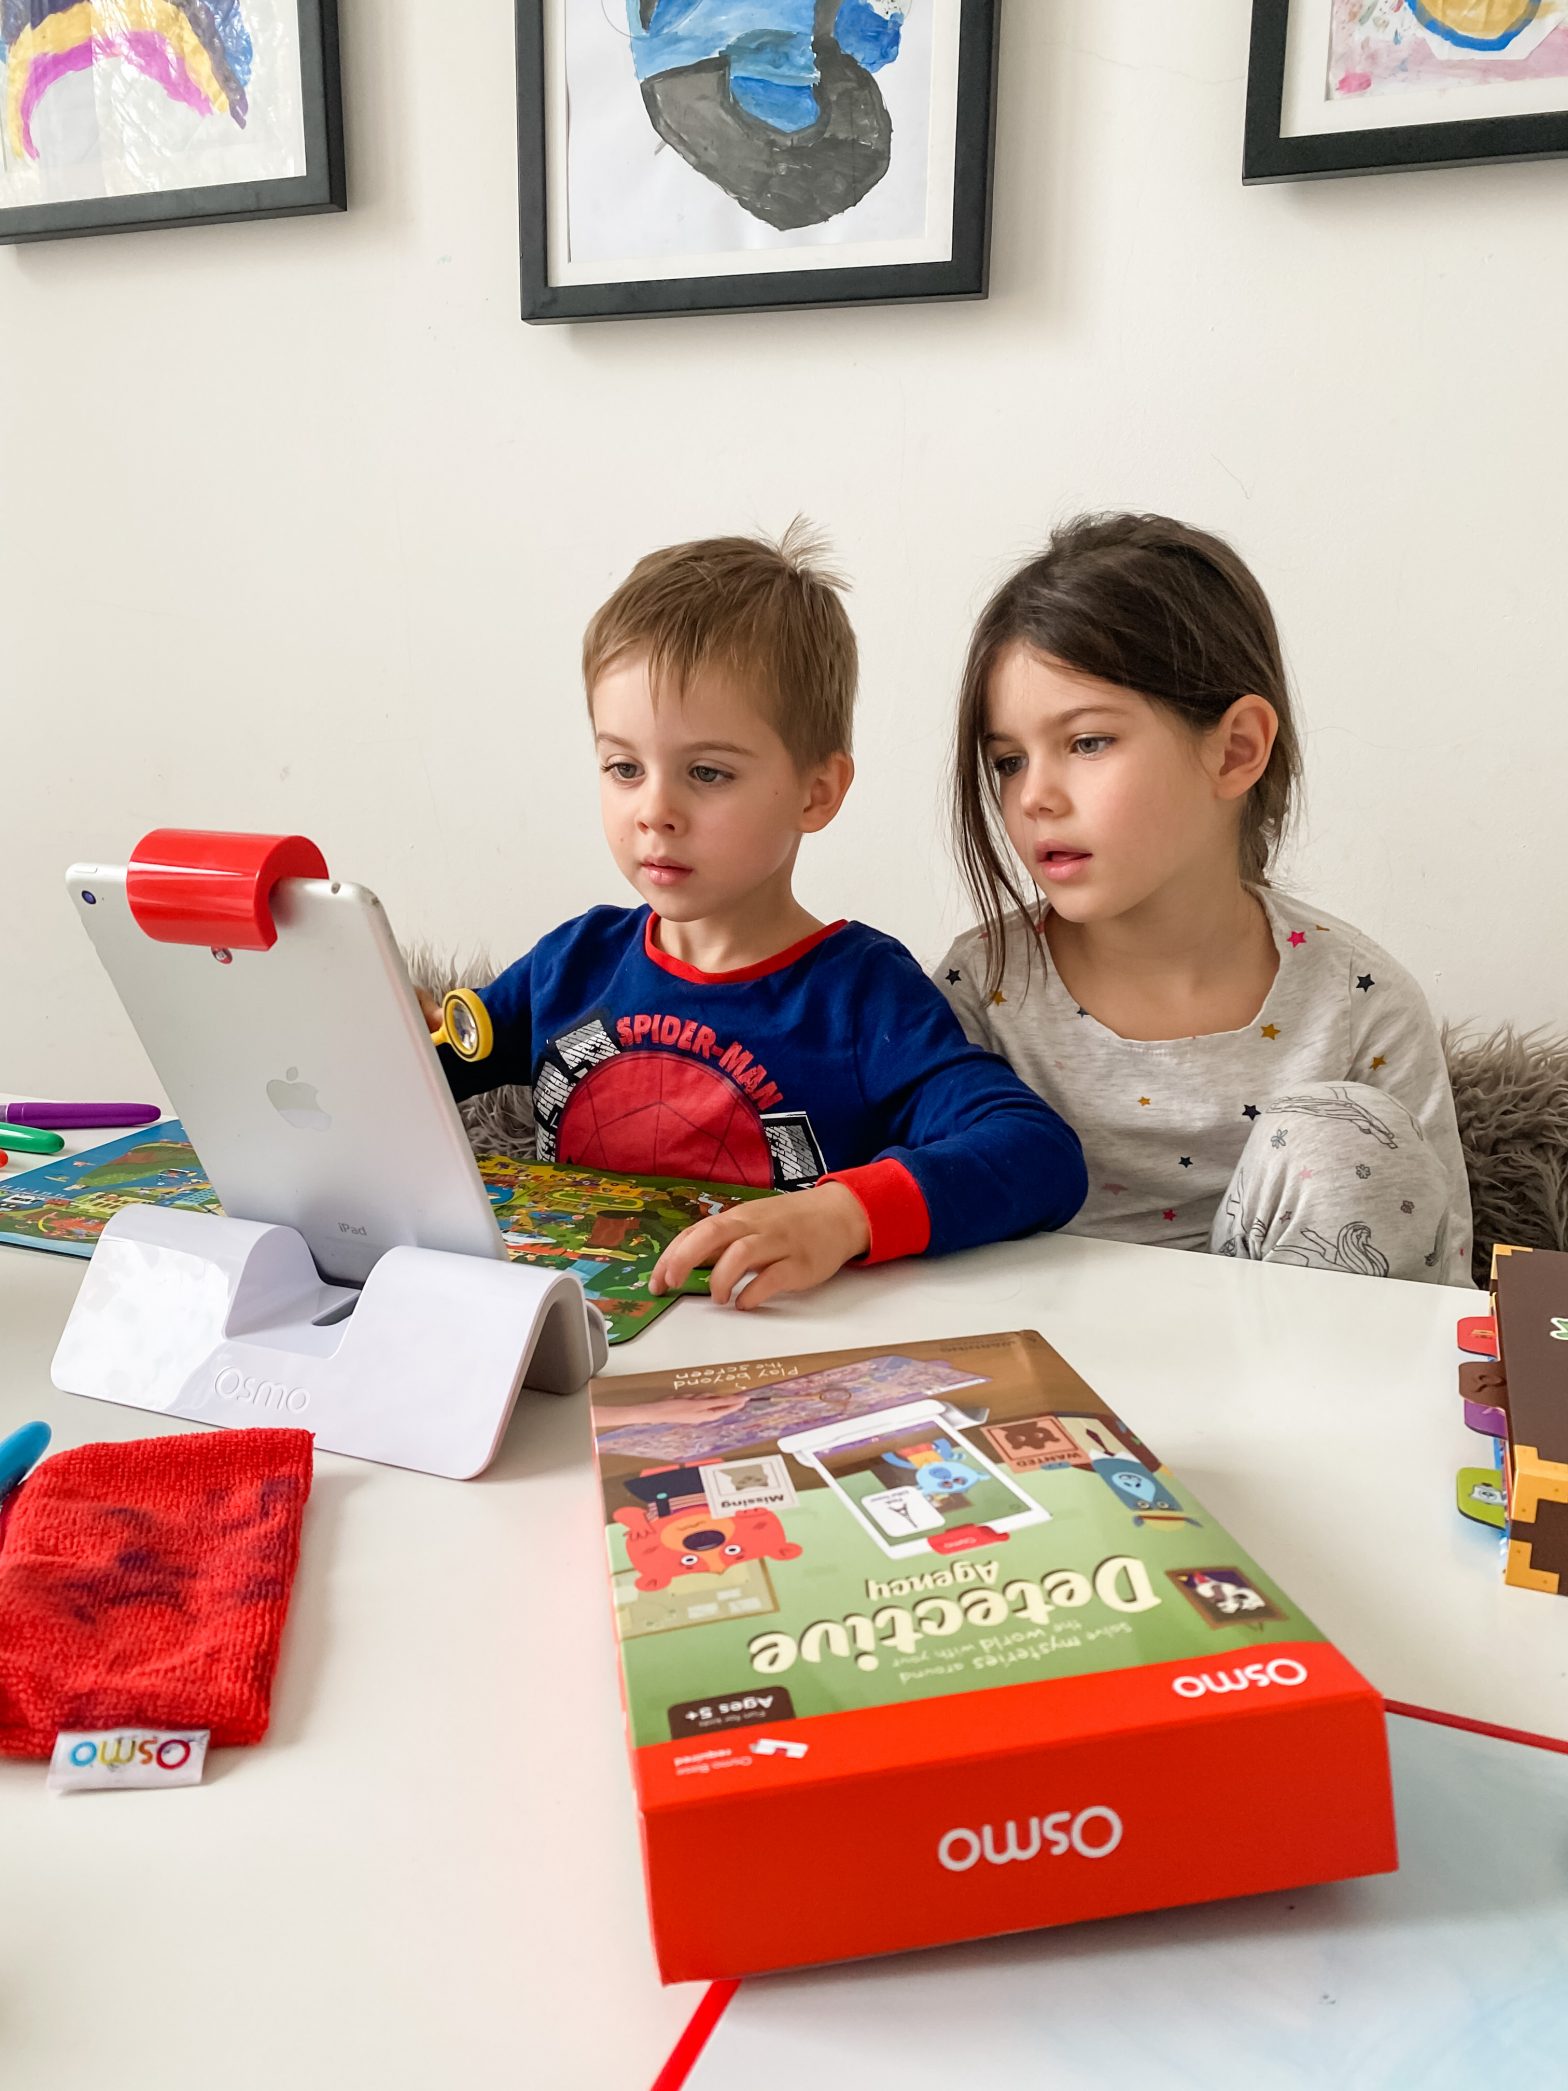
    We also have Detective Agency- search and Find Mystery Game that both have played together peacefully giving me time for a lovely cup of coffee and to clean the kitchen 😉 This one is more on the entertaining side, but it still teaches the kids while having fun.

    All in all, I have to say that we truly love this gift we received from Osmo. I find it super useful and entertaining and highly recommend it. Also, there is a lovely giveaway you should enter HERE I wish you all the best of luck and a peaceful lockdown. Big hugs!

  • Homemade bath bombs

    Homemade bath bombs

    Ariana is a big fan of bath bombs. I mean, who isn’t right? It’s just so satisfactory watching them dissolve in your bath while the smell of the essential oils surrounds you, the colours make your bath water look cool and you see all those tiny bubbles disturbing the surface of the water…

    Unfortunately, good quality bath bombs tend to be very expensive and a lot of them use not so good for the skin colouring agents. That’s when Ariana asked me why couldn’t we just made our own. And I though, oh well, why not? We had previously attended a workshop at Lush, where they taught us how to press the bath bombs together, so it was really a matter to make the mixture beforehand. I started my research and I discovered that making your own is pretty popular and you can even buy kits for it on Amazon (like this one) but I preferred to select our own essential oils and use different colourings for ours and we simply bought each ingredient separately.

    Obviously being Ariana who she is, an aspiring scientist, she started asking me why bath bombs fizz, but during my research I had already prepared the answers to the questions I thought she would ask and I was prepared! So I started to explain about chemical reactions and how when baking soda and citric acid are mixed and are then put in water, react against each other making all the little bubbles that we see while the bath bombs dissolves in the bath water. These bubbles that make the water become so fizzy are made of carbon dioxide gas. I stopped the explanation right after explaining what carbon dioxide is because otherwise there would have been no end!

    So, without further info to share except the recipe, I’ll just write that up for you 🙂

    You will need:
    – 2 cups baking soda
    – 1 cup epsom salts, powdered
    – 1 cup citric acid
    – 1 cup cornstarch
    – 5 tablespoons coconut oil, melted
    – a bit of water in a spray bottle
    – 30 drops your preferred essential oil
    butterfly pea powder for the blue, turmeric for the yellow, pitaya powder for the pink (or you can use food colouring)
    – a large bowl to mix into and separate smaller ones for the different colours
    – bath bomb moulds (we used these ones), chocolate silicone moulds or similar

    In the large bowl, mix the citric acid, epsom salts, cornstarch and baking soda. Add the coconut oil slowly and mix well, spray water regularly until you can just about press the mixture and it keeps its shape. Don’t add more water at that stage. It’s important to not add the water all at once at the beginning as you can activate the chemical reaction and have the bubbles starting before you even made the bombs!

    At this stage you can add the essential oils and mix well and then divide the mixture into smaller bowls ready for colouring. Add the colours to each bowl mixing well to have an homogeneous looking bath bomb.

    Now it’s time to make the bath bombs! All you need to do it to fill both sides of a mould with your preferred colours, whether its a mixture of various ones in layers or just one. you need to fill the bath bomb way more than to the top but don’t press the top much as you want the two sides to merge when you press them together and it doesn’t happen if each side has been already pressed down. (hopefully this makes sense to you!)

    Once you have boths sides overfilled, merge them quickly together and press to make the bath bomb shape. Some excess mixture will come out- that its normal. And that’s it. Definitely not rocket science and its a lot of fun to do. Apart from the science lesson, you can also ask the kids to help measure the ingredients etc so they get engaged during the whole process. Keep each bath bomb on its mould until the next day so they set. After 24 hours they are ready to be taken out of the mould and use or store for up to 6 months 🙂


  • Working with concrete for succulent planters

    Working with concrete for succulent planters

    One of the projects Ariana and myself enjoyed the most this summer, was making these super cool concrete planters. It was fun (and easy) from beginning to end- choosing the paper and plastic containers for the shapes, choosing the plants for each, mixing the concrete with water and finally, assembling the whole project together! Oliver just watched us through the whole process highly uninterested, but I am hoping to get him engaged in our craft making soon 🙂

    There are different ways to make concrete pieces; you can buy the ready to mix powder, like Breton (which we did on this occasion) or mix the concrete with sand yourself to various proportions.This lat option is certainly the way to go if you are planning to do larger pieces because the other mix would be too expensive. I have been looking for a white coloured concrete for a project I have in mind and it seems Snowcrete is widely available, but regular concrete would do for a grey looking finish.

    Making these super cool pots didn’t take long at all (except the waiting time for the concrete to dry!) and it was super easy. I mean, Ariana is 3 and she managed to get them done almost by herself. All you need to do is to choose two containers per pot. The larger one will make the outside of the pot determining both the size and shape of the final product. The smaller one, will set the size of the interior of the pot and that would be the space that you would have for your succulents. We are not leaving a drainage whole, so bear that in mind when choosing the plants to go inside.

    Mix your concrete powder with water as specified in the instructions, foil the pots you are going to use to make it easy to remove them once the concrete is set. You will need to oil the inside and bottom of the larger pot and the outside and bottom of the smaller one. Fill the larger pot with the mixture and press down the smaller container inside to create the hole. Clean the top of the pot or flatten the concrete on the surface for an even finish. You will have to weight down the inside pot as it is difficult to keep it down without applying pressure. It is also a good idea to tap the container a few times on a hard surface to help the bubbles to come up making sure the whole pot is even and stronger without any air pockets.

    Leave the pot to dry for 24 hours and remove (or peel) away the containers. Fill them with soil and plants and they are ready to decorate your house or to give as a gift to someone else. We made one for us and one for Tia Hele (The kids adoptive auntie here in London). She LOVED it 🙂