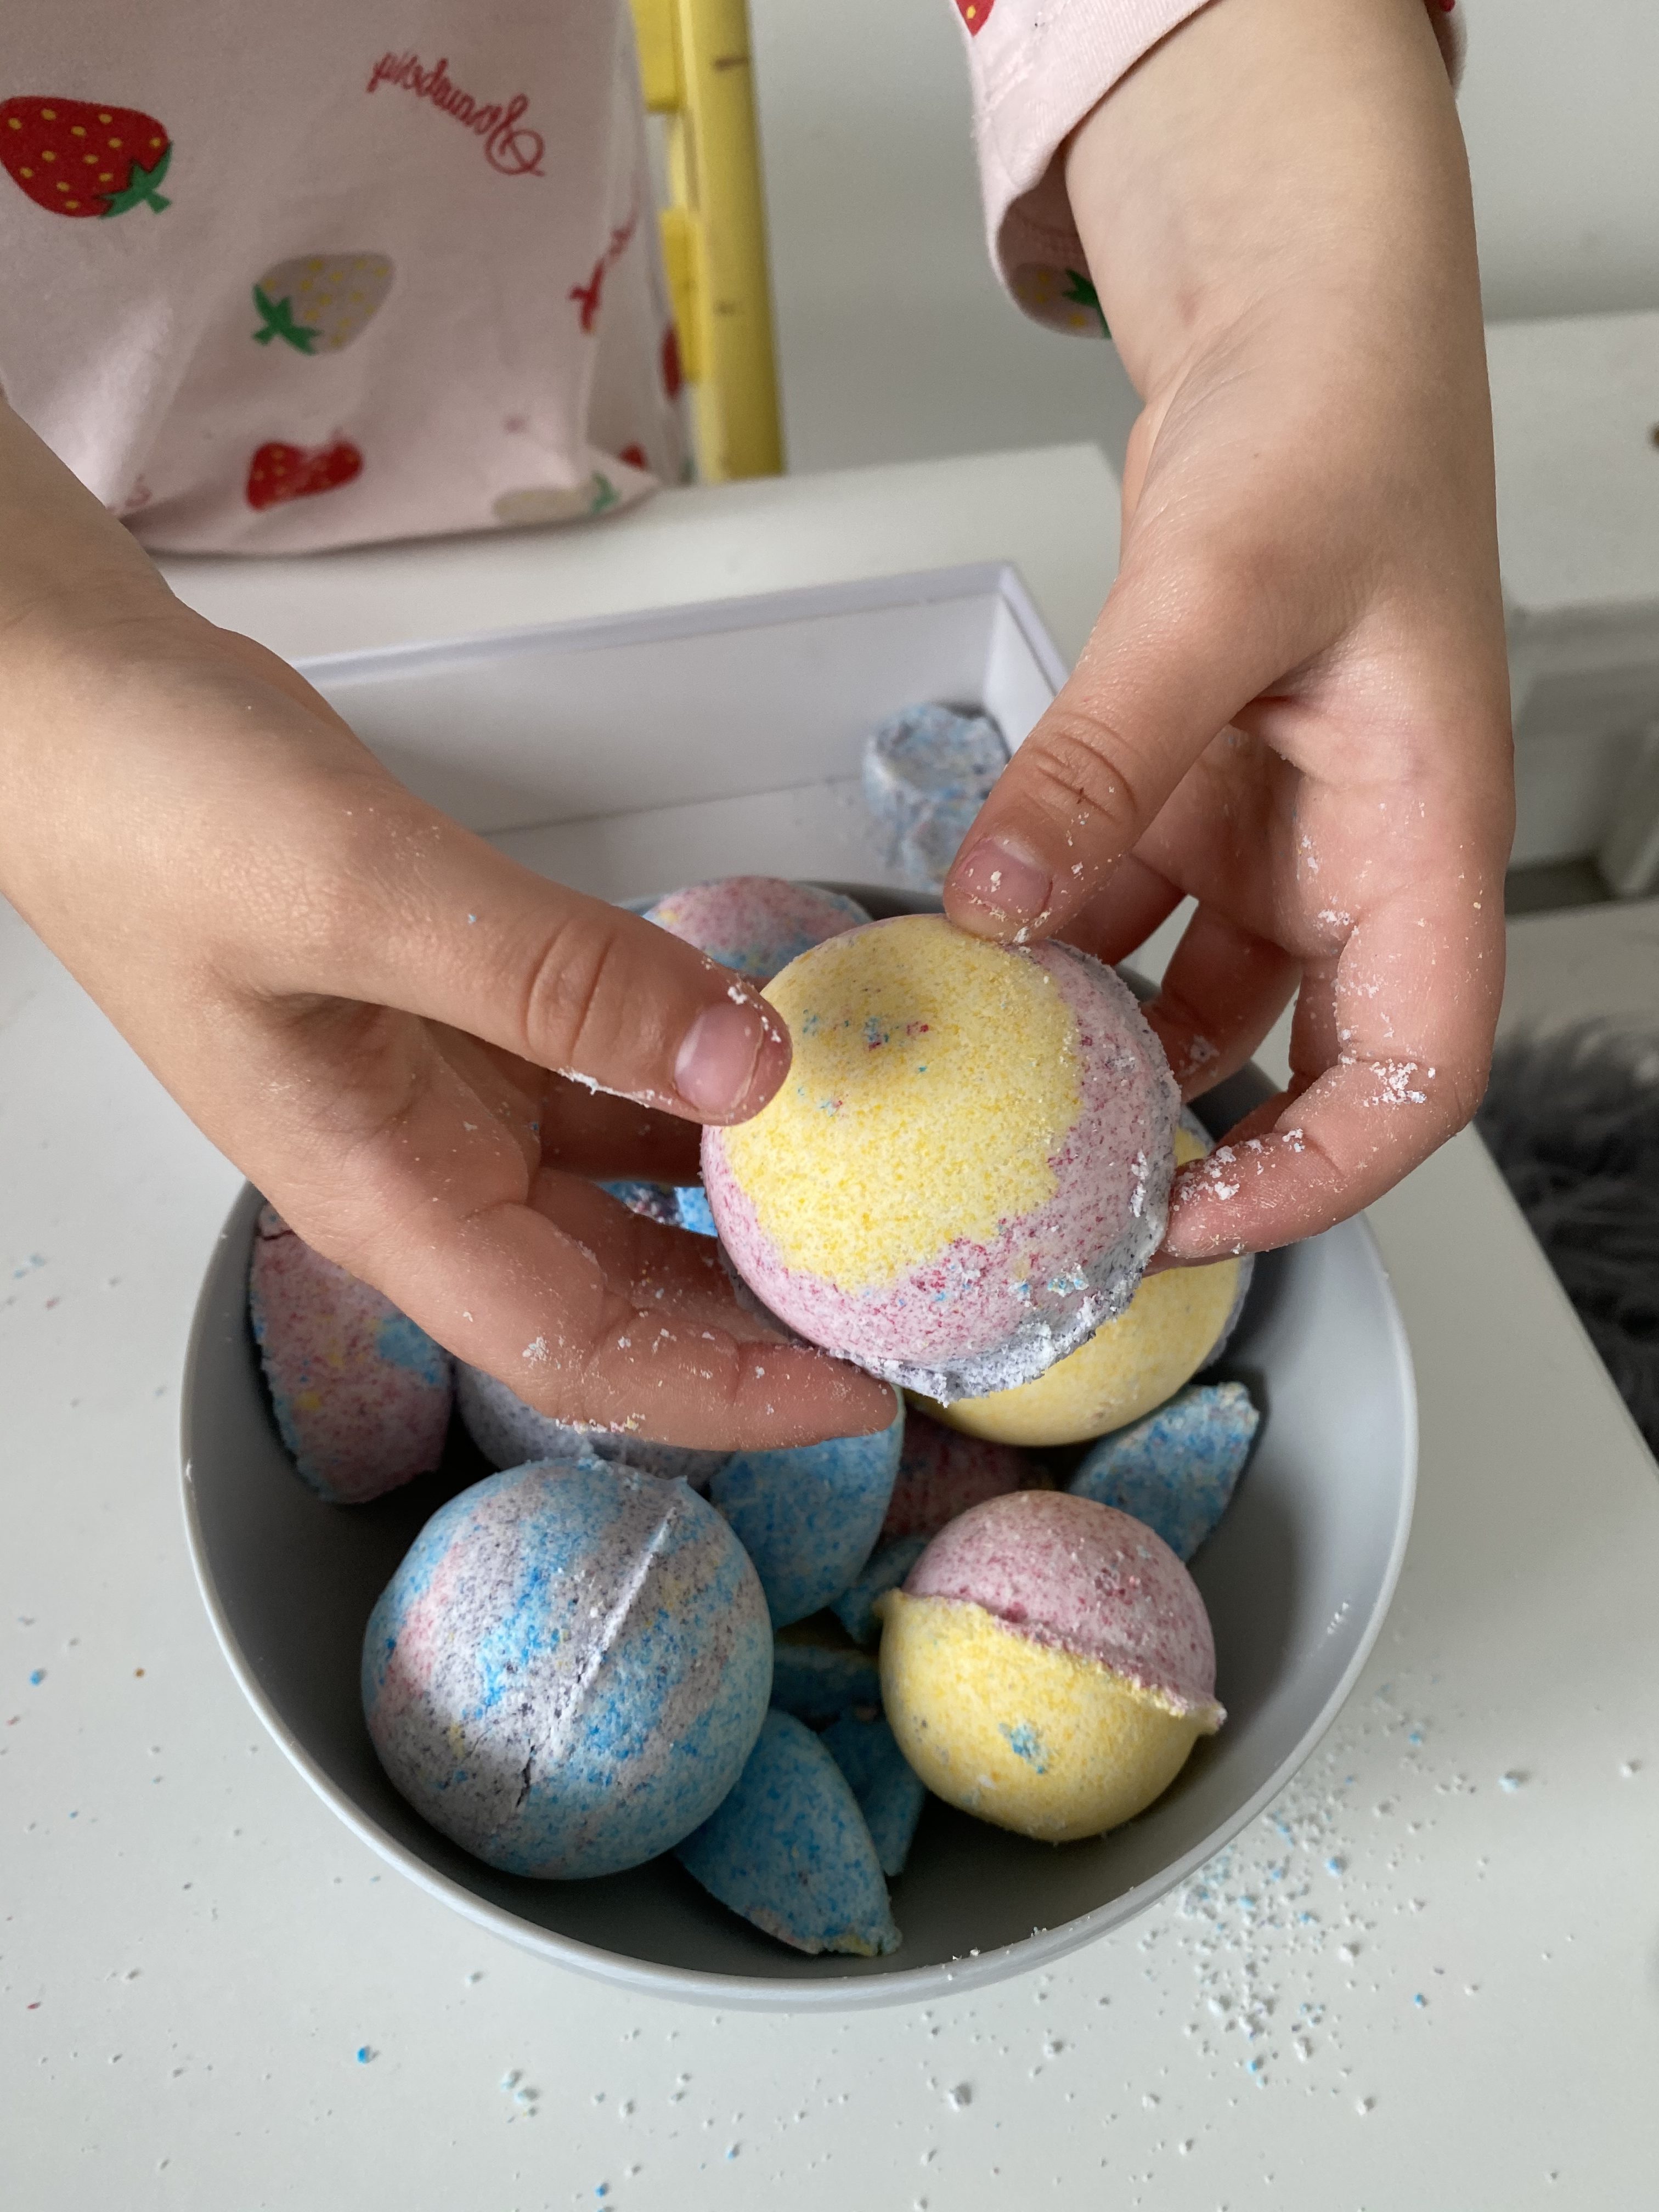
Ariana is a big fan of bath bombs. I mean, who isn’t right? It’s just so satisfactory watching them dissolve in your bath while the smell of the essential oils surrounds you, the colours make your bath water look cool and you see all those tiny bubbles disturbing the surface of the water…
Unfortunately, good quality bath bombs tend to be very expensive and a lot of them use not so good for the skin colouring agents. That’s when Ariana asked me why couldn’t we just made our own. And I though, oh well, why not? We had previously attended a workshop at Lush, where they taught us how to press the bath bombs together, so it was really a matter to make the mixture beforehand. I started my research and I discovered that making your own is pretty popular and you can even buy kits for it on Amazon (like this one) but I preferred to select our own essential oils and use different colourings for ours and we simply bought each ingredient separately.
Obviously being Ariana who she is, an aspiring scientist, she started asking me why bath bombs fizz, but during my research I had already prepared the answers to the questions I thought she would ask and I was prepared! So I started to explain about chemical reactions and how when baking soda and citric acid are mixed and are then put in water, react against each other making all the little bubbles that we see while the bath bombs dissolves in the bath water. These bubbles that make the water become so fizzy are made of carbon dioxide gas. I stopped the explanation right after explaining what carbon dioxide is because otherwise there would have been no end!
So, without further info to share except the recipe, I’ll just write that up for you 🙂
You will need:
– 2 cups baking soda
– 1 cup epsom salts, powdered
– 1 cup citric acid
– 1 cup cornstarch
– 5 tablespoons coconut oil, melted
– a bit of water in a spray bottle
– 30 drops your preferred essential oil
– butterfly pea powder for the blue, turmeric for the yellow, pitaya powder for the pink (or you can use food colouring)
– a large bowl to mix into and separate smaller ones for the different colours
– bath bomb moulds (we used these ones), chocolate silicone moulds or similar
In the large bowl, mix the citric acid, epsom salts, cornstarch and baking soda. Add the coconut oil slowly and mix well, spray water regularly until you can just about press the mixture and it keeps its shape. Don’t add more water at that stage. It’s important to not add the water all at once at the beginning as you can activate the chemical reaction and have the bubbles starting before you even made the bombs!
At this stage you can add the essential oils and mix well and then divide the mixture into smaller bowls ready for colouring. Add the colours to each bowl mixing well to have an homogeneous looking bath bomb.
Now it’s time to make the bath bombs! All you need to do it to fill both sides of a mould with your preferred colours, whether its a mixture of various ones in layers or just one. you need to fill the bath bomb way more than to the top but don’t press the top much as you want the two sides to merge when you press them together and it doesn’t happen if each side has been already pressed down. (hopefully this makes sense to you!)
Once you have boths sides overfilled, merge them quickly together and press to make the bath bomb shape. Some excess mixture will come out- that its normal. And that’s it. Definitely not rocket science and its a lot of fun to do. Apart from the science lesson, you can also ask the kids to help measure the ingredients etc so they get engaged during the whole process. Keep each bath bomb on its mould until the next day so they set. After 24 hours they are ready to be taken out of the mould and use or store for up to 6 months 🙂